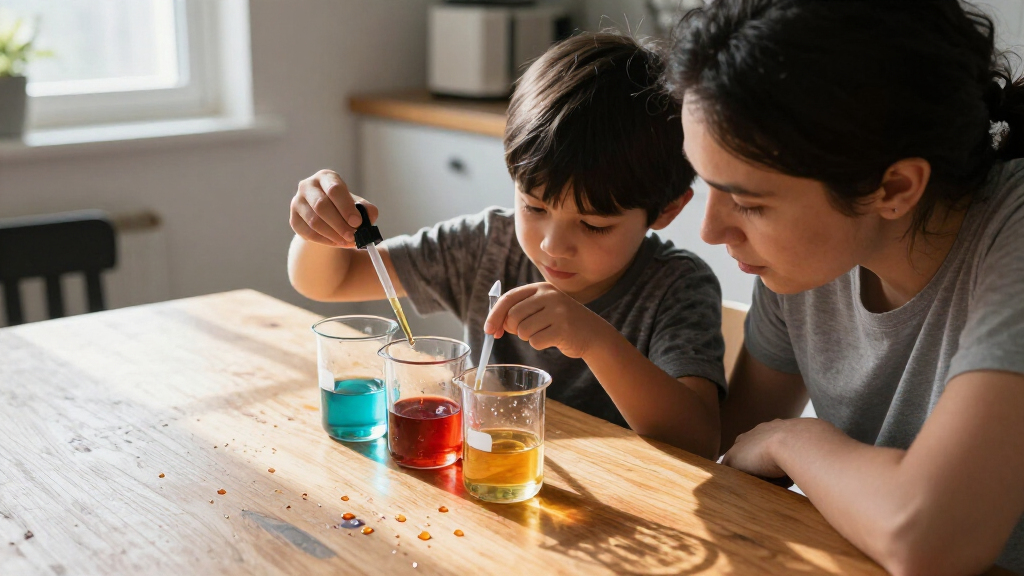

This guide helps parents, caregivers, and educators choose an educational science experiment kit and use it with a learner. You will check the kit’s suitability, set up a safe workspace, follow one experiment’s directions, and record what happened. No specialized science experience is needed. Allow 30-90 minutes for selection and one experiment; some activities need extra time for growing, cooling, or observing results.

Get school and study supplies delivered free — and shop member deals
- Fast, free delivery on millions of items
- Access to Prime Big Deal Days deals on October 6–7
- Prime Video, Amazon Music and more included
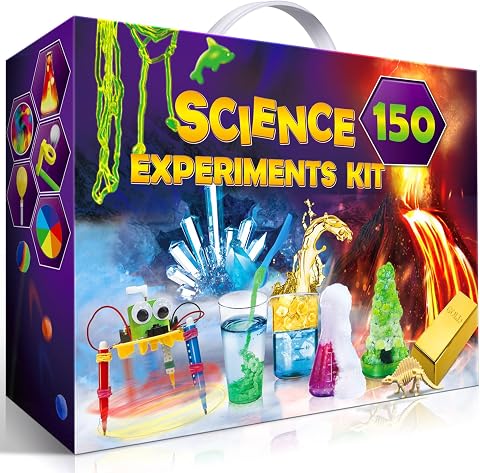
UNGLINGA 150-Experiment Science Kit for Kids
- ✔ Brand: UNGLINGA
- ✔ Set name: 150 Experiments
- ✔ Experiment count: 150
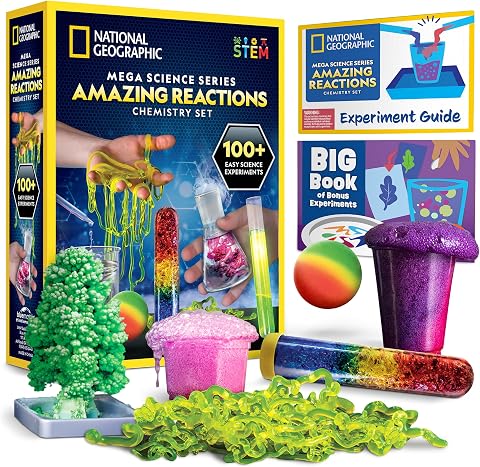
National Geographic Amazing Chemistry Set with 100+ Experiments for Ages 8–12
- ✔ Brand: Blue Marble
- ✔ Age range: 8 years and up
- ✔ Experiment ideas: 100+ total: 15 with included materials and 85 bonus

National Geographic Science Magic Kit for Kids
- ✔ Brand: Blue Marble
- ✔ Age range: 8 years and up
- ✔ Experiments with included materials: 20
Difficulty: Beginner | Time: 30-90 minutes, depending on the experiment
What You’ll Need
Tools & Materials:
- An educational science experiment kit with its instruction booklet
- The kit’s listed household supplies, such as water, paper towels, or a spoon
- A clear, washable work surface
- Safety glasses or gloves if the kit directions call for them
- Notebook or printed activity sheet and a pencil
- Timer, measuring cup, or other basic tools named in the instructions
Knowledge:
- Ability to read and follow the kit instructions
- For a child, adult supervision appropriate to the age label and experiment
- Willingness to observe, measure, and record results without tasting materials
Read the age range, contents list, warnings, and full instructions before opening chemical packets or starting an activity. Check for allergies and confirm that the learner can use any included tools safely. Do not use kit materials for food preparation, and do not substitute ingredients unless the manufacturer gives permission.
UNGLINGA 150-Experiment Science Kit for Kids
UNGLINGA earns our top spot because it gives families the widest stated subject range in this group: its 150 experiments span chemistry, physics, earth science, and more. That breadth makes it a stronger choice for a child whose interests are still developing than either National Geographic option, each of which is built around a more specific theme. The illustrated, step-by-step manual also helps turn a box of tools into guided activities rather than leaving children to invent a project from scratch.The important qualification is that the experiment count should not be read as a promise that every project is self-contained. Some activities require ordinary household items, so an adult may need to check instructions and gather extras before a session. Compared with the Amazing Chemistry Set, UNGLINGA has broader coverage but is less clearly centered on named chemistry apparatus such as test tubes, beakers, and pipettes. Compared with the Science Magic Kit, it favors open-ended science exploration over tricks designed to perform. Choose it when variety matters most; skip it if you want a chemistry-only kit with a tightly defined set of supplied demonstrations or a performance-led activity.
Pros:
- Offers 150 experiments across several science topics
- Illustrated manual presents activities step by step
- Includes kid-friendly science tools and materials
- Encourages hands-on learning and shared parent-child activities
Cons:
- Some experiments require household items that are not included
- Its wide-ranging theme may be less focused than a chemistry-specific kit
Best for: Children eight and up who want to sample several science subjects, with a parent or caregiver available to help prepare activities that use household supplies.
Not ideal for: Buyers seeking a chemistry-only experience, a kit where every listed activity is confirmed to have materials included, or a magic-trick format.
Bottom line: We recommend UNGLINGA for families who value broad, guided science exploration and can supply occasional household extras.
“We recommend UNGLINGA for families who value broad, guided science exploration and can supply occasional household extras.”
National Geographic Amazing Chemistry Set with 100+ Experiments for Ages 8–12
This set is the most direct fit for a child who wants to handle familiar lab-style equipment. Test tubes, beakers, and pipettes give the activities a more explicitly chemistry-focused feel than UNGLINGA’s broader mix, and the described demonstrations include growing a crystal tree and making color-changing solutions. That focus can make it easier for a young learner to connect tools with observable changes rather than jumping among unrelated science topics.Its headline total needs context: materials are included for 15 experiments, while the other 85-plus ideas in the guide use household items. That does not make the bonus activities useless, but it changes how ready-to-go the kit is compared with a buyer who expects supplies for every listed project. UNGLINGA may suit families looking for a broader science sampler, while the Science Magic Kit makes a more playful choice for children drawn to performance. Choose this one for a chemistry-centered introduction and useful basic apparatus; look elsewhere if you want wide subject coverage or the largest clearly stated set of supplied-material experiments.
Pros:
- Includes test tubes, beakers, and pipettes
- Supplies materials for 15 chemistry experiments
- Combines demonstrations such as crystal growing and color-changing solutions
- Adds 85 bonus experiment ideas using common household items
Cons:
- Materials are included for only 15 of the 100-plus experiment ideas
- The chemistry focus is narrower than UNGLINGA’s multi-topic coverage
- Bonus activities require household supplies
Best for: Children ages eight and up who are particularly curious about chemistry and would enjoy using basic lab-style tools in guided demonstrations.
Not ideal for: Families expecting included materials for all 100-plus listed experiments, or children who would prefer physics, earth science, or magic-themed activities.
Bottom line: We favor this set for chemistry-minded children who value lab-style tools and understand that most bonus activities rely on household items.
“We favor this set for chemistry-minded children who value lab-style tools and understand that most bonus activities rely on household items.”
National Geographic Science Magic Kit for Kids
The Science Magic Kit makes the most sense for children who are motivated by showing someone what a science activity can do. It combines magic tricks with hands-on science, and the supplied materials support 20 experiments. That performance angle gives it a distinct role in this lineup: UNGLINGA emphasizes breadth, and the Amazing Chemistry Set foregrounds lab-style chemistry, while this kit uses mystery and demonstration to invite engagement.A booklet with more than 85 additional magic experiments extends the idea list, but the product information does not say those extra activities come with materials. We would therefore treat them as additional instructions, not as 85-plus fully stocked projects. The supplied details also name no specific tools, so buyers looking for recognizable equipment such as the chemistry set’s test tubes, beakers, and pipettes have a clearer case with that alternative. Choose the magic kit when a child loves tricks and sharing demonstrations; skip it if your priority is cross-disciplinary coverage or a more conventional science-lab setup.
Pros:
- Includes materials for 20 magic-themed experiments
- Adds more than 85 activities in a bonus booklet
- Combines magic, chemistry, and STEM activities
- Offers a performance-led alternative to conventional experiment formats
Cons:
- The theme is more specialized than UNGLINGA’s broad science sampler
- The supplied details do not specify tools or materials for bonus activities
- Less directly focused on lab-style chemistry equipment than the Amazing Chemistry Set
Best for: Children eight and up who enjoy magic tricks, demonstrations, and sharing playful science activities with family or friends.
Not ideal for: Buyers seeking broad coverage across science subjects, specified chemistry tools, or confirmation that bonus-booklet activities include their materials.
Bottom line: We recommend the Science Magic Kit when performance and playful surprise are the best route to a child’s interest in science.
“We recommend the Science Magic Kit when performance and playful surprise are the best route to a child’s interest in science.”
As an Amazon Associate we earn from qualifying purchases.
Before You Start
Choose an experiment that fits the learner’s age, attention span, and interests. A short activity with visible results often works well for a first session. Check whether the experiment requires waiting, sunlight, a freezer, or supplies that are not included. Keep food and drinks away from the workspace, and keep younger children and pets clear of small parts and chemicals. Follow the kit label and local disposal guidance; never pour an unknown substance down a drain unless the directions say to.
Step-by-Step Instructions
Step 1: Select a suitable kit
Read the package’s recommended age, activity descriptions, and safety notices. Match the kit to the learner’s interests and reading ability. Look for an activity that can be completed in the available time and check whether an adult must handle any part. If selecting online, review the full contents list and manufacturer instructions rather than relying only on the product title.
Tip:For a first project, choose one experiment with a clear question and an observable result, such as testing how light affects a plant or comparing how materials absorb water.
Check: You can name the experiment you plan to try, confirm it suits the learner, and identify any adult-only tasks.
Step 2: Check the contents and instructions
Place the unopened kit on the work surface and compare its contents with the booklet’s inventory. Read the complete instructions for the chosen activity, including preparation, timing, cleanup, and disposal. Gather every household item listed before beginning. Contact the seller or manufacturer if an essential part is missing; do not improvise a replacement for a chemical or safety item.
Tip:Some kits contain several activities. Keep unused materials sealed and separate so they are not mixed up with the supplies for the experiment you chose.
Check: All required parts and household supplies are present, and you know the steps, waiting periods, and cleanup requirements.
Step 3: Set up a safe workspace
Clear a stable, washable surface with enough room for the booklet, materials, and notebook. Move food, drinks, and unrelated objects away. Put on the safety gear specified in the instructions, tie back long hair, and wash hands before handling materials. Have paper towels and a waste container nearby, but keep waste separate until you have checked the disposal directions.
Tip:Position the instructions where they stay dry and visible. An adult should handle hot water, sharp tools, glassware, or substances marked for adult use.
Check: The work area is uncluttered, required protection is on hand, and the learner can work without reaching over materials.
Step 4: State the question and prediction
Read the experiment’s question aloud and ask the learner what they think will happen. Help them make a specific prediction that can be checked, such as which of two materials will absorb more water or whether a plant in light will grow differently from one kept in shade. Write the prediction in the notebook before starting so the result does not change what was expected.
Tip:Accept a prediction even if it turns out to be wrong. The purpose is to compare an expectation with observations, not to guess the result correctly.
Check: The learner can explain what result they expect, and the prediction is recorded before the test begins.
Step 5: Run the experiment as written
Follow the booklet in order, measuring quantities and observing the stated timing. Let the learner complete age-appropriate tasks while an adult supervises. Change only one test factor when the instructions call for a comparison, and keep other conditions the same. Do not taste, smell closely, or touch materials unless the directions specifically permit contact.
Tip:Do not combine leftover materials or repeat a reaction in a larger quantity. Kit activities are designed for the amounts and containers specified.
Check: The experiment was carried out in the stated order and amounts, with any timing or safety directions followed.
Step 6: Record observations and results
Write down what you see at the times specified. Record measurements with units, and describe visible changes such as color, shape, temperature reading, or growth. If the experiment compares samples, label each one clearly. Distinguish observations from explanations: write what happened first, then discuss what may have caused it.
Tip:For a result that develops over hours or days, record the start time and schedule a reminder for each observation. Keep samples in the conditions described by the kit.
Check: Your notes identify the samples, timing, and measurements clearly enough for someone else to understand what happened.
Step 7: Compare the outcome with the prediction
Review the notes and compare the observed result with the original prediction. Ask which evidence supports the conclusion and whether anything unexpected occurred. If the result is unclear, say so rather than forcing an answer. Discuss one possible reason, such as a measurement difference, and decide whether a carefully repeated test would help.
Tip:A different-than-expected outcome is still useful. It can reveal a condition to test or a measurement to check next time.
Check: The learner can describe the result using recorded evidence and say whether it matched the prediction.
Step 8: Clean up and store the kit
Follow the booklet’s disposal directions before discarding or saving any materials. Clean reusable tools as directed, wipe the surface, and wash hands. Let any saved samples remain in a safe, labeled place only if the instructions call for continued observation. Return dry, unused components to the kit and store it as directed, out of reach of young children and pets.
Tip:Do not save a mixture for another activity unless the manufacturer specifically says it can be stored and reused.
Check: Waste has been handled according to the directions, the workspace is clean, and the kit is stored safely.
Common Mistakes to Avoid
- Discarding a substance or mixture without checking its disposal directions. — Read cleanup instructions before the experiment and follow the kit label and local disposal guidance.
Troubleshooting
Problem: A material spills or contacts skin or eyes.
Solution: Stop the activity and follow the kit’s first-aid and spill instructions. Get an adult’s help immediately. For eye or skin exposure, use the directions on the product label and seek medical or poison-control advice when the label directs or symptoms occur.
What Success Looks Like
The task is complete when you have selected an age-appropriate kit, followed its safety and experiment directions, recorded observations, and cleaned and stored materials as instructed. The learner should be able to state the experiment’s question, describe the result using notes or measurements, and compare it with the prediction. A result that does not match the prediction can still count as a successful experiment if the procedure and safety directions were followed and the outcome was recorded honestly.
Next Steps
Save the notes with the kit or take a photo of the results before putting the booklet away. If the activity invites a repeat, change one test factor at a time and record the new conditions. For projects that continue over several days, keep the observation schedule and storage conditions specified in the instructions. Replace used consumables only with manufacturer-approved parts, and retire damaged containers or tools. Ask the manufacturer for guidance if instructions are unclear or a kit component appears defective.
Frequently Asked Questions
How do I choose a science kit for a young child?
Use the age range and safety warnings on the package as your first filter. Choose an activity the child can follow with adult supervision, and check for small parts, chemicals, or tools that require adult handling. A simple activity with visible results is often a good starting point.
Can I use household substitutes if a kit material is missing?
Only use a substitute if the instructions or manufacturer approve it. Similar-looking materials can behave differently, affect the result, or create a safety risk. Pause the activity and ask the seller or manufacturer about a missing kit component.
What should I do if the experiment does not work?
Check the quantities, order of steps, timing, and required conditions against the booklet. Record what happened rather than altering the notes. If you followed the directions and still see no result, contact the manufacturer for activity-specific help.
Can we repeat the experiment?
Repeat it only if the instructions allow another run and you have enough materials. Keep the procedure the same when checking whether the result is repeatable. To test a new idea, change one factor and write down that change.
How should I dispose of experiment materials?
Follow the kit label and activity booklet, along with local disposal guidance. Do not pour an unknown mixture down a drain or put it in household waste unless the directions permit it. Ask the manufacturer or local waste service if the instructions do not explain disposal.
Halloween Picks
halloween
As an affiliate, we earn on qualifying purchases.